一、实现webpack骨架屏
书接上文,由于在vue-cli4里面直接使用 vue-skeleton-webpack-plugin插件失败 (插件基于vue2开发),而项目是vue3开发,这就导致了不兼容,于是乎就开始了手撸…
二、骨架屏的由来:
1
2
3
| 单页面应用在现在的前端页面开发是越来越常见了。
它的好处很多,坏处也很明显:就是首屏加载往往很慢,呈现一片空白的页面,这给用户的体验感是很差的。
可资源的加载我们除了尽量地优化,也没有其他很好的办法了。为了解决这个体验感的问题,骨架屏应运而生。
|
三、骨架屏原理:
1
2
3
4
5
6
7
8
| <html lang="en">
<head>
<meta charset="UTF-8">
</head>
<body>
<div id="app"></div>
</body>
</html>
|
单页面应用其实就是一个html文件,html结构里面有一个div#app,当js加载完毕并且执行完成后,id为app的div会被整个替换掉。所以由此我们可以想到,我们在div#app里面写一些动画之类的html结构,在js没有加载完成的时候,让用户看到的不是一片空白,而是预先写好的骨架页面。这样的体验感是不是会好一点呢。
四、webpack插件的编写:
(1)webpack插件介绍
首先得构建一个简单的webpack项目(这个过程不详细说了)。在根目录下新建一个skeleton.js文件。由于我们需要在每次打包的时候都重新生成新的骨架屏的index.html文件,所以这里需要用到html-webpack-plugin插件。我们在skeleton.js插件注入html-webpack-plugin插件的监听器,在html-webpack-plugin插件生成index.html之前做骨架屏代码的插入。
(2)但插件的具体实现
首先在index.html同级目录下新建文件skeleton.html,用于编写骨架屏的dom结构 (具体样式可自行修改调整)。
1
2
3
4
5
6
7
8
9
10
11
12
13
14
15
16
17
18
19
20
21
22
23
24
25
26
27
28
29
30
31
32
33
34
35
36
37
38
39
40
41
42
43
44
45
46
47
48
49
50
51
52
53
54
55
56
57
58
59
60
61
62
63
64
65
66
67
68
69
| <div id="app" class="loader">
<div class="loading-text">loading...</div>
<div class="loading"></div>
</div>
<style>
.loader {
width: 100vw;
height: 100vh;
overflow: hidden;
background: #fff;
display: flex;
flex-direction: column;
align-items: center;
justify-content: center;
}
.loading-text {
color: #002;
font-size: 22px;
animation: bit 0.6s alternate infinite;
}
.loading {
width: 70%;
height: 10px;
margin-top: 30px;
background: lightgrey;
border-radius: 10px;
position: relative;
}
.loading::after {
content: "";
position: absolute;
top: 0;
left: 0;
width: 50%;
height: 10px;
background: #002;
border-radius: 10px;
z-index: 1;
animation: loading 0.6s alternate infinite;
}
@keyframes bit {
from {
opacity: 0.3;
}
to {
opacity: 1;
}
}
@keyframes loading {
0% {
left: 25%;
}
100% {
left: 50%;
}
0% {
left: 0%;
}
}
</style>
|
由此可以知道,我们的骨架屏插件要有一个apply的方法,在安装插件时,会被webpack compiler 调用一次。 该apply方法传入compiler参数,该参数暴露了webpack生命周期钩子函数供开发者使用,我们可以使用它来访问 webpack 的主环境。使用方法为:compiler.hooks.钩子函数名称.tap(…)。
1
2
3
4
5
6
7
8
9
10
11
12
13
14
15
16
17
18
19
20
21
22
23
24
25
26
27
28
29
30
31
32
33
34
35
| const HtmlWebpackPlugin = require("html-webpack-plugin");
const fs = require("fs");
class SkeletonPlugin {
constructor(options) {
this.template = options.template;
}
apply(compiler) {
compiler.hooks.compilation.tap("SkeletonPlugin", (compilation) => {
HtmlWebpackPlugin.getHooks(compilation).beforeEmit.tapAsync(
"SkeletonPlugin",
(htmlData, callback) => {
const that = this;
fs.readFile(this.template, "utf-8", function (error, data) {
if (error) {
callback(null, htmlData);
} else {
htmlData.html = htmlData.html.replace(
'<div id="app"></div>',
data
);
callback(null, htmlData);
}
});
}
);
});
}
}
module.exports = SkeletonPlugin;
|
(3)插件的使用
最后在vue-cli的配置文件vue.config.js里写上以下代码:
1
2
3
4
5
6
7
8
9
10
11
12
13
14
15
16
17
18
19
20
21
22
23
24
25
26
27
28
29
30
| // 加载path模块
const path = require("path");
// 定义resolve方法,把相对路径转换成绝对路径
const resolve = (dir) => path.join(__dirname, dir);
const HtmlWebpackPlugin = require("html-webpack-plugin");
const SkeletonPlugin = require("./src/plugins/skeleton");
configureWebpack: (config) => {
const plugins = [];
plugins.push(
new HtmlWebpackPlugin({
template: resolve("public/index.html"),
inject: "body",
cdn: isOpenCDN ? CDN : {}, // 指定cdn链接加载 (备注:这里会碰到一个问题,如果使用了CDN链接动态加载第三方包,需要在这里指定加载)
})
);
// 骨架屏
plugins.push(
new SkeletonPlugin({
template: resolve("public/skeleton.html"), // 骨架路径
})
);
config.plugins = [...config.plugins, ...plugins];
},
|
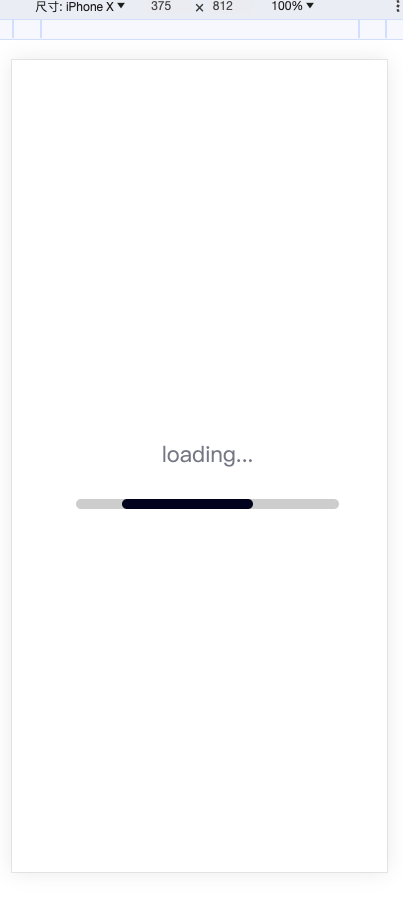
打包完成后 运行,将浏览器的节流模式打开,高速3G模式就可以很直观的看到效果,如下:

四、结束语:
到这里简单的骨架屏插件就完成了。但这个插件只会在首次加载页面的时候有骨架屏效果。对于其他页面是没有效果的。


